Managing the Spool
Most of your time using a spool will be spent managing the output objects contained in the spool. EViews provides easy-to-use tools for the all of the basics tasks like adding, deleting, extracting, and rearranging objects, as well as more advanced operations such as hiding objects and flattening portions of the tree.
Adding Objects
You may add an output object to a spool using any of the three primary methods: printing to the spool, copy-and-pasting objects, using the spool append procedure.
Printing to a Spool
Perhaps the easiest approach is to redirect the printing of the your object output into a spool object. You may, for example, display the estimation results for an equation, or perhaps the histogram view of a series, and “print” the output directly into a spool. Note that this method does not require you to freezing the original object view to create a separate output object.
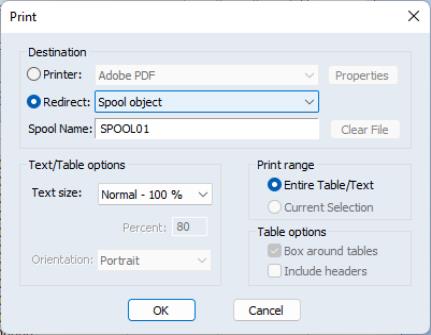
To redirect your print job into the spool, simply click on from the object toolbar, or select from the main EViews menu. In the dialog that opens, you should set the to , specify as the redirect target, and then specify the name of the spool to which you wish to print. If you specify a spool object that does not exist, a new spool with the specified name will be created and a copy of your object will be added to it.
Click on to continue. EViews will add an output object containing the contents of the object window to the spool object.
If you wish to send all subsequent print jobs to the spool object, you may use the main dialog or the
output command to change the default print destination to your spool (see
“Print Setup” and
output). Then you may simply display your view, then click on and to send the output to the spool object.
Copy-and-Paste to a Spool
Alternately, objects may be copied from the workfile window and pasted into an existing spool object. Simply select the objects you wish to copy in the workfile window and press CTRL-C or select from the main or the right-button menus. Next display the spool object window, and paste into the main object pane by pressing CTRL-V, or selecting from the main or right mouse-button menus.
EViews will append copies of output (graph, table, text, and spool) objects directly into the spool; for other types of objects, EViews will append copies of the frozen default views. For example, if you copy-and-paste a series, EViews will add a copy of the default spreadsheet view to the spool.
We emphasize that the objects contained in a spool are frozen copies of the original objects. The objects in the spool are independent of the source objects so that changes made to either the copy or the original will not have an effect on the other.
Appending to a Spool
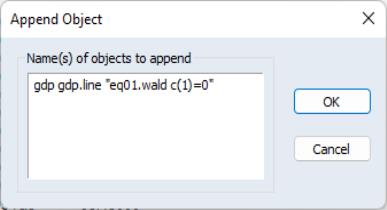
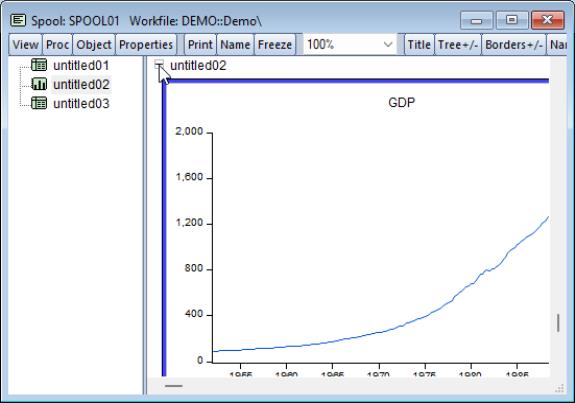
Lastly, you may select from the menu of an existing spool object. You will be prompted by a dialog where you can enter the names of the objects to be added and commands for displaying the desired output windows in a space delimited list. Here, for example, we instruct EViews to display the default spreadsheet view for GDP, a line graph for GDP, and as a Wald test for “c(1)=0” in equation EQ01, and to save the results for each of these three views into the spool.
Note that when adding multiple outputs you should make certain to separate the names and commands by spaces. If necessary, you should enclose the text in double quotes, if, for example, the command statement includes spaces as in the Wald example above.
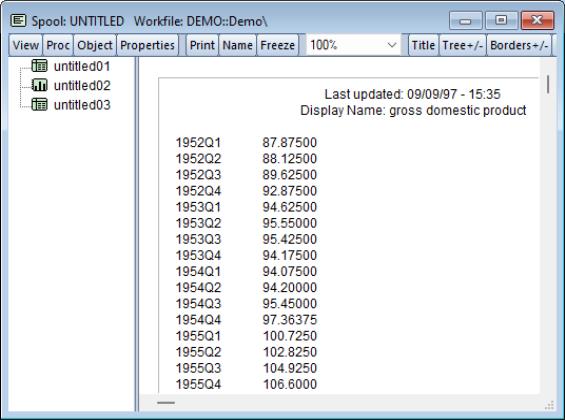
Click on to continue. The tree pane of the spool now shows the three object names and types, while the main output pane allows you to view the objects. You may scroll the window between output objects by clicking on the icon in the tree pane or by using the scrollbar on the right-hand side of the output pane.
Note that the newly added objects are all given names that are variations on the name “UNTITLED”. You may wish to provide more descriptive names (see
“Naming Objects”).
Click on and enter MYSPOOL to name the spool object.
Embedded Spools
Spool objects may contain other spool objects. Nested spools allows you to categorize or group output objects within a spool.
There are two ways to add a spool object to an existing spool. First, if the spool you wish to add exists in your workfile then you may insert it into a spool as you would any other object using print, copy-and-paste, or the append proc as described in
“Adding Objects”.
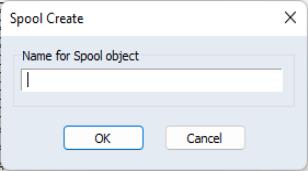
Second, you may add a new (empty) spool object to the spool by selecting ... and entering a space separated list of one or more names for the new spools. The names given to spools must be valid EViews names. EViews will create and append a new spool for each specified name. If there are duplicate names in the spool, the new spools will be named using the next available name.
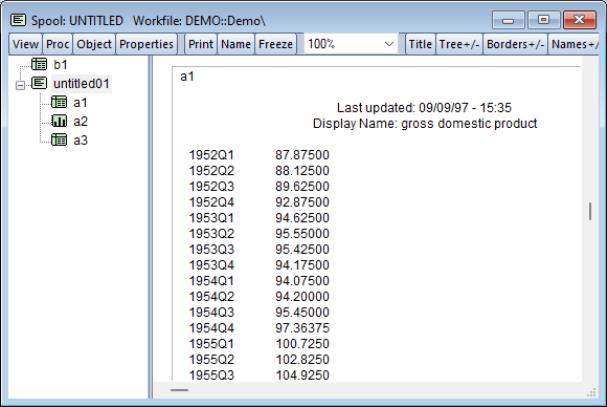
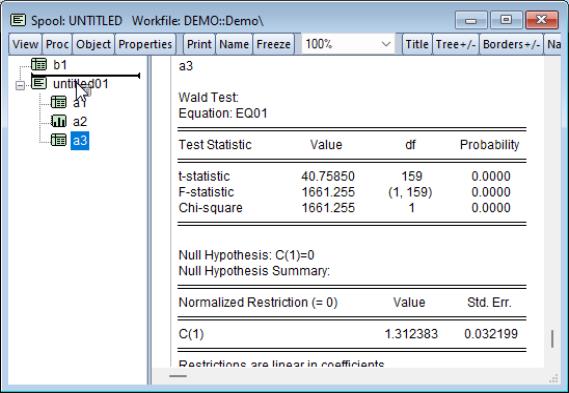
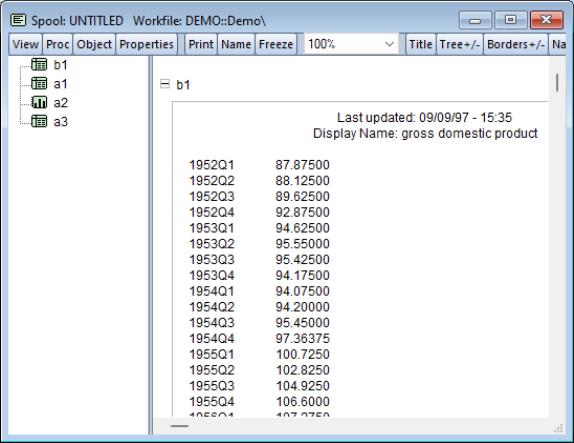
Suppose, for example, we have the named spool object MYSPOOL, which contains three output objects (A1, A2, and A3). We next create a new, UNITITLED spool object containing the output object B1. Lastly, we append MYSPOOL, and it’s three output objects by copying-and-pasting MYSPOOL into the UNITITLED main object pane.
The contents of MYSPOOL are added to the end of the spool object. The copy of the spool object, shown with the spool icon, is assigned the name UNTITLED01.
The tree entry for UNITLED01 is shown here in open fashion, with the three output objects in the embedded spool displayed in the branch of the tree. Clicking on B1 in the root of the tree scrolls the output window so that B1 is displayed in the main output pane; clicking on A1 in the UNTITLED01 branch of the tree scrolls to the A1 output object from MYSPOOL. As with all tree structures, you may click on the tree icon next to UNTITLED01 to open or collapse the display of the branch.
It is worth noting that the embedded spool object is a full-fledged output object inside the parent spool. Thus, selecting an embedded spool and performing operations such as naming, commenting, hiding, indenting, resize,
etc. applies to the embedded spool object, and not to the objects inside the embedded spool. The most important implication of this fact is that if you wish to change the properties of the objects within an embedded spool, you must display the embedded spool in edit mode so that you can access its settings and its individual elements (
“Editing Objects in a Spool”), or you must first move the object out of the spool, or you may flatten or move all of the objects out of the embedded spool (
“Flattening a Spool”).
For example, the easiest way to turn on comments for all of the objects within the embedded spool in the example above is to double click on UNTITLED01 in the tree pane to activate edit mode, then to modify its display settings by clicking on the button. By placing the embedded spool in edit mode, we gain access to its display settings; if instead we pressed in standard mode, we would activate comments for the objects in the parent spool only. (See
“Editing Objects in a Spool” for additional discussion).
Naming Objects
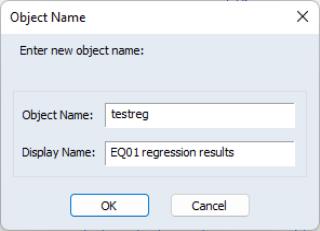
To rename an output object in the spool, select the object name in the tree pane or select the output object in the main output page, then right mouse-click and select . EViews will display the dialog.
Note that the dialog may also be called up by double-clicking on the name of the object, if visible, in the main object window (see
“Display Properties” for a discussion of name display settings).
Simply enter a new, valid EViews name in the field, and if desired a display name in the optional field. The display name allows you to provide a more descriptive label that may be employed in place of the object name in the tree pane view when displaying object names.
Since all spool output objects will, by default, be named using some variant of “UNTITLED”, we recommend that if you have spools with more than a few objects, you assign them more descriptive object or display names.
Adding Comments
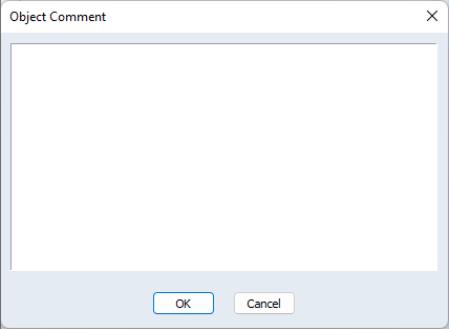
Comments may be added to objects, allowing you to annotate individual objects in the spool. To add a comment to an object or to change the existing comment, select the object of interest, then choose the right button menu item to bring up the dialog.
The dialog may also be called up by double-clicking on the comment for an object, if visible, in the main object window (see
“Display Properties” for a discussion of comment display settings).
Enter your comment or edit the existing comment and click on to add it to the object.
Hiding Objects
After creating a spool with objects of various types, you may wish to view a subset of the objects. You may hide objects either individually or by type (tables, graphs, or text).
Hiding Individual Objects
You may hide or show objects individually using a variety of methods. The easiest method is to select an object in the spool using the tree pane or the main window, and select from either the or right mouse-button menus to toggle the item between hidden and visible.
Note that hiding an embedded spool hides all of the objects in the embedded spool.
Objects that are hidden do not appear in the main window; if, however, the spool settings are to display titles or comments (
“Display Properties”), the object title or comments will still be visible.
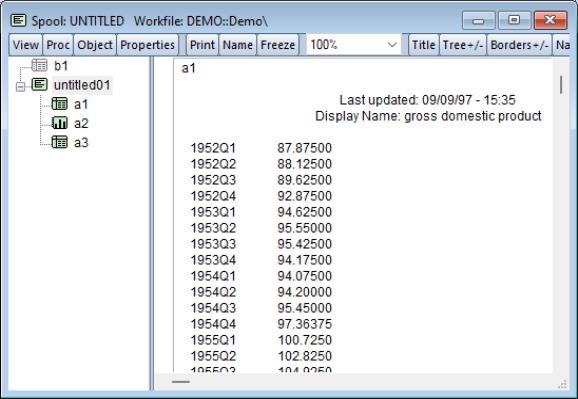
The icon for hidden objects will be grayed out in the tree pane. Here, we see that the B1 table object in the main branch of the spool is hidden.
An alternate method requires that object title display be turned on. Click the button to bring up the dialog, and check the checkbox. When titles are displayed, the main window will contain a box containing a “+” or “–” alongside the name of the objects in the spool. Clicking on the box will toggle the object between being hidden and visible. In this example, clicking on the “–” symbol will hide UNTITLED02.
Hiding Types of Objects
You may wish to hide objects of a specific type. Objects can be hidden by type by selecting and choosing , , , or . Conversely, to show hidden objects of a specified type select .
Resizing Objects
You may use the spool object to override the sizes of individual output objects.
The default is for graph objects to be displayed at a fixed size while tables and text objects are displayed at their native sizes. This implies that all graphs are displayed with the same width, whatever the size of the individual graph, while tables and text objects are displayed using the widths and font sizes specified in the individual object.
There are two different ways of using the spool to change the display size for an object. But before you are allowed to alter the display size of an object you must make certain that its display mode is set to or (see
“Display Modes” for details).
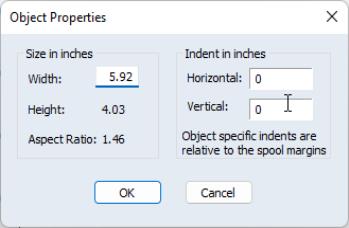
First, you may select the object in the tree pane or by clicking on the object in the main window. Press the right mouse-button and select to open the dialog. Enter the desired in the edit field and click on . EViews will resize the object, maintaining the original aspect ratio. Font sizes in the object will be scaled accordingly.
Alternately, if the frame for an object is displayed in the output window, you may drag the border to resize the object (see
“Display Properties” for a discussion of border display settings).
Note that resizing the object does not alter the native size of the object. You may at any time select an object, right-click, and choose to return an individual object to its native size. Or, you may use the spool object to reset the display of all of your objects to their native sizes (see
“Display Modes”).
Indenting Objects
To change the indentation of an object you should first select the object in the tree pane or by clicking on the object in the main window. Press the right mouse-button and select to open the dialog. Enter the desired indentation in the and edit fields, and click on to continue.
Note that the indentation values set in the section dialog will be added to any margins set for the spool.
Removing Objects
To remove an object from a spool select the object then press the key or select from the right mouse-button menu. EViews will prompt you for whether you wish to continue. Click on to proceed.
Note that if you remove a spool object, you will remove it and all of the objects contained in the spool. If you wish to retain some of the nested objects you must move them outside of the embedded spool (
“Rearranging Objects”) prior to deleting the spool. Alternately, you may simply delete a subset of objects within the embedded spool.
Extracting Objects
You may copy, or extract, an object in a spool into the workfile. To extract an object, simply highlight the object, and then select from the right mouse-button menu, or click on . EViews will create an untitled output object in the workfile containing a copy of the object in the spool.
Rearranging Objects
Suppose, for example, that you have placed a number of output objects in the spool, but they are not in the desired order for your presentation. You may reorder objects in the spool using the tree pane to move objects (one at a time) to different positions in the spool.
To move an object, you should select it in the tree pane and drag it to the desired position. A horizontal black bar will indicate the object’s new location when the mouse button is released. If the destination is an embedded spool, EViews will move the object into the embedded spool.
Note that objects may easily be moved into and out of embedded spool objects. In our example, we move the table object A3 from the embedded spool UNTITLED01 into the top level of the spool, just below B1.
In some cases, moving objects into or out of an embedded spool will cause an object name conflict. In these cases, EViews will automatically been renamed objects in the spool to resolve the conflict.
Flattening a Spool
You may move all of the objects out of an embedded spool by flattening the spool. Flattening moves out all of the output objects into the main spool (including objects in any spools embedded in the embedded spool), and then deletes the now empty spool.
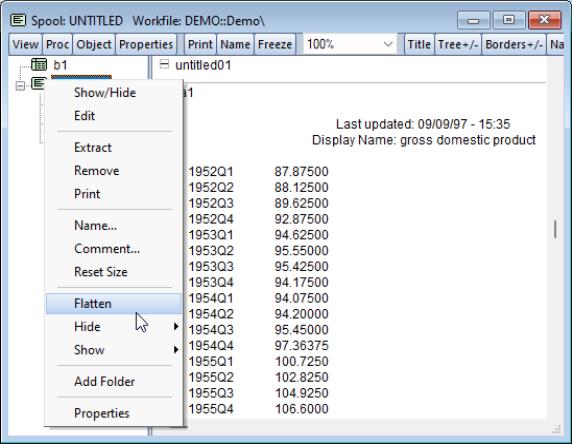
Select the name of the embedded spool you wish to flatten in the tree pane, then click on or press the right mouse-button and select . EViews will replace the spool with all of the output objects in the spool.
In our example, we select the spool object UNTITLED02, and use the right mouse-button to select . EViews will replace UNTITLED02 with all of its child output objects, renaming the objects as necessary to avoid name conflict.